13 things you should clean every week in your home

Hannah has dedicated her career to understanding what matters to consumers, and writes practical, trustworthy advice to help people spend wisely and make everyday life easier.

Keeping your home clean is essential for preventing the build-up of dirt, grime, bacteria and allergens. But are you cleaning frequently enough?
From wiping down surfaces to disinfecting high-touch points, several areas around your home need more attention than others to stay spotless and germ-free.
Thankfully, a weekly cleaning routine doesn't need to feel like a chore. Spending just a few minutes on the key household spots each week prevents large messes from piling up and helps maintain a calm, tidy living space.
We've rounded up the things you might be overlooking each week, along with expert advice to make cleaning your home quicker, easier and less stressful.
1. Bed sheets, pillow cases and duvet covers

After a long day, it can be easy to fall into bed without considering how clean your sheets, pillow cases and duvet covers actually are.
But the average person will spend a third of their life in bed. This means your bedding inevitably accumulates dirt, dead skin cells, dust mites and sweat – all of which can worsen allergies and skin conditions.
The London Fire Brigade also warns that a build-up of residue from emollients or skin creams on bedding can increase flammability, especially if you spend extended periods in bed due to impaired mobility.
With this in mind, most people should wash their bedding once a week.
How to wash bedding
We recommend washing most bedding at 60°C, as colder temperatures may not kill all of the bacteria or remove sweat as effectively.
If you have silk sheets, wash them at 30°C and use a mild detergent. Always check the label.
For those who are sensitive to allergens or have asthma, washing your bedding more frequently at 60°C or hotter may help to alleviate symptoms.
Allergy UK suggests that, if you have a dust mite allergy, you can invest in allergen barrier covers for your bedding to minimise your contact with dust mites.
Discover more expert cleaning tips in our guide to how often you should wash your bedding
2. Bath towels

Your bath towels may appear clean, but they easily collect moisture, dead skin cells and body oils, creating an ideal environment for bacteria, mould and musty odours to thrive.
While cleaning frequency depends on your household setup, the American Cleaning Institute recommends washing towels after every three to five uses, provided they are hung up and allowed to dry between each use.
Other professionals advise washing once a week, particularly hand towels. However, if you live alone or you're the only one using your towel, you can probably stretch this by a few extra days.
If you have children or pets at home, you might find you need to wash your towels every few days. Anything used to dry your face should also be washed after one or two uses.
How to wash towels
Machine wash your towels at 40°C. We suggest bio washing powder, as it's generally more effective at removing bacteria and viruses.
To allow enough room for the towels to move freely, ensure the washing machine drum is no more than three-quarters full.
We also recommend avoiding fabric softener and using less laundry detergent to prevent residue building up and help the cotton fibres regain their normal shape.
Once the washing cycle is complete, give your towels a good shake to help them fluff up and kickstart the drying process.
Then you can line dry your towels or, for best results, pop them in your tumble dryer.
If you don't have a garden with a washing line or tumble dryer, a heated clothes airer will help speed up the process and provide better results than a clothes horse.
Keep your towels at their best with our step-by-step guide on how to get soft, fluffy towels
3. Carpets

Carpets can easily trap dust, dirt, pet hair and food crumbs, which can wear down fibres and cause unpleasant odours.
To prolong your carpet's life and maintain a clean living space, you should aim to vacuum at least twice a week.
High-traffic areas, such as hallways, and homes with furry friends, may require more frequent vacuuming.
How to vacuum your carpet
Start by taking your rugs outside, giving them a good shake and beating. Follow this by vacuuming both the underside and top.
Once they're dust-free, roll them up while you turn your attention to the rest of the carpet.
Always refer to your vacuum cleaner's manual for optimal settings and specific floor heads for carpets to ensure it remains effective.
Dust and dirt can also sink deeper into the most trodden areas, such as living rooms or stairs, so doing several passes over these can help you to achieve a more thorough clean.
Be sure to replace the bag or empty the dust container regularly. Our tests have found suction drops when the bag or container is full of dust, sometimes by as much as 30%.
If you're experiencing issues with your current vacuum, it might be time for a new one. See our reviews of the best corded vacuum cleaners, best cordless vacuum cleaners, best handheld vacuum cleaners and best robot vacuum cleaners.
Is your carpet in need of a more thorough clean? Find out how to deep clean a carpet by hand – without a carpet cleaning machine or any expensive products
4. Hard wood floors

Hard wood floors require regular vacuuming to prevent dirt, dust and grit building up in joints and scratching the surface.
Depending on your household, floorboards and laminate should be vacuumed around once a week.
How to vacuum hard wood floors
Begin by quickly sweeping the floor to prevent larger debris becoming lodged in your vacuum.
As with carpets, always refer to your vacuum cleaner's manual for specific settings and tools for wooden floors.
No matter your vacuuming technique, it's worth going over the same spot a few times, as even our highest-scoring models don't pick up every bit of dust on the first pass.
Dust and debris also collect at the edges of hard floors, so make sure to clean right up to the wall. If the floor head can't reach the edge, attach the crevice tool to the hose (or use the end of the hose itself) to vacuum along the gap.
Make your floors sparkle with our expert reviews of the best hard wood floor cleaners and best floor mops
5. Kitchen surfaces and appliances

Maintaining a clean and tidy kitchen is vital for a healthy home. Not only does regular cleaning prevent harmful bacteria contaminating your meals, it also eliminates crumbs that attract pests and stops greasy, baked-on grime damaging your appliances.
Kitchen counters and tables should be cleaned after each meal to stop bacteria spreading.
If you've prepared raw meat, fish or poultry on a worktop, disinfect the area after use to help prevent cross-contamination.
For countertop appliances, a quick wipe down every week is sufficient.
How to clean kitchen surfaces and appliances
The Food Standards Agency (FSA) recommends using a clean cloth and hot, soapy water to remove visible grease, grime and food residue, followed by a disinfectant to sanitise surfaces. See our independent reviews of the best kitchen cleaning sprays that will keep your surfaces spotless.
The FSA also advises clearing and cleaning as you go, keeping your kitchen free from clutter and wiping away spills as soon as they happen. Avoid using damp tea towels or dirty cloths as these can easily spread bacteria to food and surrounding surfaces.
To clean the exterior of your kettle, toaster, air fryer or microwave, use a microfibre cloth to leave a fingerprint-free finish.
Keep your appliances fresh and working smoothly with our trusted advice on how to deep clean your kitchen appliances
6. Kitchen bins

Food scraps and liquids quickly build up in your kitchen bin. It's important to stay on top of this by emptying and cleaning your bin regularly.
Kitchen bins can also start to smell surprisingly quickly, particularly during hot weather. As well as being unpleasant, bad smells can attract maggots and flies and create ideal conditions for bacteria to grow.
How to clean a kitchen bin
To prevent a smelly kitchen, you should empty the contents of your bin every week. You'll probably need to do this more often during the summer months, or if you have a separate food waste bin.
Once you've removed the contents, wipe down the inside and outside of your bin using an antibacterial spray or diluted bleach solution.
Finish the job by sprinkling bicarbonate of soda in the base to absorb any lingering odours.
If your bin is showing signs of wear or smells persist after cleaning, it might be time for a replacement. Check out the best kitchen bins from our expert tests.
Keep odours, grime and flies under control during hot weather with our 5 easy ways to avoid a smelly wheelie bin
7. Dishwasher door rim and seals

While the rubber seals on a dishwasher are designed to prevent water from escaping during a cycle, they can easily trap moisture, grease and old food scraps. This creates a prime environment for bacteria and mould to grow.
Food debris that accumulates along the door rim can also cause the seals to degrade over time, potentially leading to leaks.
How to clean the dishwasher door rim and seals
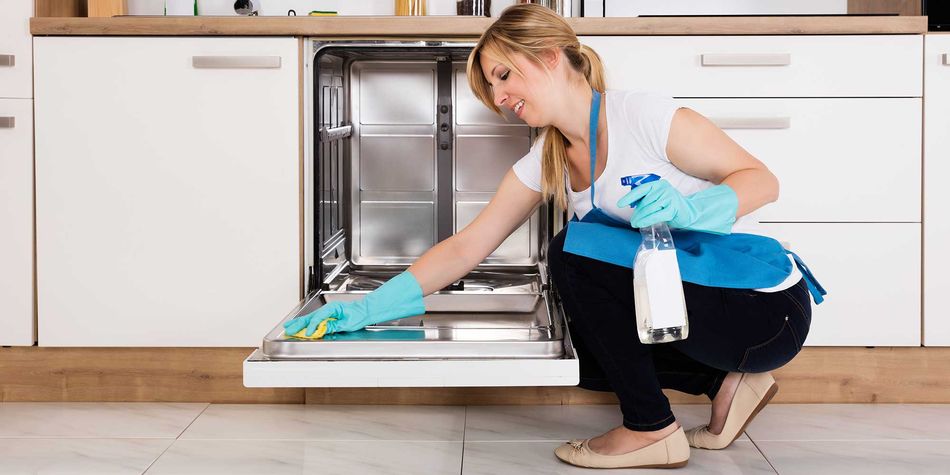
If you use your dishwasher regularly, a quick weekly wipe of the rims and seals with a damp cloth is all you need to do.
Follow our step-by-step guide on how to clean a dishwasher
8. Hob extractor filters

Cooker hoods are easily overlooked in the kitchen, despite quietly collecting grease and grime every day.
If filters are not cleaned regularly, your extractor will become less effective over time, potentially leaving a sticky residue on surrounding surfaces.
Natalie Turner, Which? consumer writer, spent five years working as a professional cleaner. She says cleaning your cooker hood every week will help your extractor work better and keep your kitchen fresher overall.
How to clean hob extractor filters
Thankfully, most cooker hood filters can be removed and cleaned surprisingly easily.
Aluminium mesh filters can be washed in the sink using hot water and washing-up liquid if there's only a light build-up of grease. If the grime is more serious, you can put it in the dishwasher.
Paper filters, on the other hand, are designed to be replaced and should last from three months up to a year. You can buy these from a supermarket and then cut to size.
Read more of the expert cleaning tips Natalie swears by
9. High-touch surfaces

High-touch points, such as light switches, door handles and TV remotes are hotspots for accumulating grime and bacteria.
Regular cleaning and disinfection of these key items and surfaces is crucial for maintaining a healthy, hygienic home.
How to clean high-touch surfaces
To help reduce the presence of germs, a quick wipe-down each week is all that's required.
Use a microfibre cloth lightly dampened with warm, soapy water or an all-purpose antibacterial spray to wipe door handles and light switches
For TV remotes and other electronics, follow the manufacturer's cleaning instructions and avoid getting moisture into any openings.
Brands including LG recommend dampening a microfibre cloth with a gentle antibacterial cleanser – or use a disinfectant wipe – to clean a remote control.
Remember to remove the batteries before you get started and allow the remote to air dry once you’re done.
Never spray water or cleaning products directly onto electrical items.
10. Bathroom fixtures and surfaces

Keeping the bathroom clean can feel like a chore, but putting off small maintenance tasks could lead to bigger problems down the line.
The warm and moist conditions in bathrooms make them the ideal environment for bacteria, mould, limescale and unpleasant odours. Fortunately, a weekly scrub is enough to help eliminate grime and keep your bathroom hygienic.
How to clean bathroom fixtures and surfaces
Use a microfibre cloth and bathroom cleaning spray to wipe down bathtubs, shower cubicles, sinks and other surfaces, making sure to dry any damp areas afterwards. If you need to shift limescale around taps and plugs, opt for a dedicated limescale remover, citric acid or distilled vinegar.
Getting into the habit of wiping down your shower after each use will also help to keep unsightly water and limescale marks at bay. Use a squeegee or window vac to help shower screens remain cleaner for longer, or a solution of water and citric acid to tackle build-up and crusty shower heads.
Take it a step further every week or two by using an old toothbrush and a paste of water and bicarbonate of soda to scrub the grout between your tiles, rinsing with water once done. If stubborn stains refuse to come out, try a specialised grout-renewal product instead.
Still feeling bogged down by bathroom cleaning? Read more of our simple tips on how to clean your bathroom
11. Toilet

Cleaning a toilet is not the most pleasant household chore, but it's essential for banishing illness-causing bacteria, such as E.coli, and stopping germs from spreading to nearby surfaces or items like toothbrushes.
How often you clean your toilet depends on how many people use it.
Delia Cannings, of the British Cleaning Council, says: 'In a family home of about five people, it's sufficient to give it a wipe over when needed and a thorough clean once a week.'
If done regularly, she says this should take around 10 minutes, although a dirtier toilet will take longer to clean.
How to clean a toilet
Start by flushing the water away to remove any debris in the bowl and provide a clearer view of the area that needs to be cleaned.
Next, use your toilet brush to push the water right back into the bowl and down the channel. That will allow you to see the tide mark – the point where the water usually rests.
Apply the cleaning agent around this point and leave it to do its work – for a few minutes or as long as the instructions on the bottle recommends.
You can then remove the brush, allow the bowl to refill, and finish by scrubbing and rinsing the inside of the toilet with the brush, making sure you reach down the channel to tackle any stains. Then flush the toilet again, remembering to close the lid.
Don't forget to use a cloth to wipe down the outside of your toilet too. When doing so, start at the cleanest parts and work towards the less clean areas to avoid redistributing contaminants.
Separate spectacular scrubbers from hygiene hazards with our expert reviews of the best toilet brushes
12. Mirrors and glass surfaces

Mirrors and glass surfaces are among the first items in homes to show dust, in addition to toothpaste splatters, fingerprints and soap marks.
The good news is you can keep these at bay with weekly cleaning, stopping grime from hardening into stubborn stains that require harsh scrubbing.
How to clean mirrors and glass surfaces
Simply spray a glass-cleaning solution onto your mirror, window or glass surface, and wipe with a dry microfibre cloth to remove any dust. Avoid using rough fibres, as they could cause scratches.
To leave surfaces sparkling and streak-free, finish off by using a window vac. If you're cleaning a circular mirror, run the window vac around the edge of the glass before finishing with the centre.
Discover more household jobs you can tackle with a window vac
13. Dust around the house

Weekly dusting helps to minimise indoor allergens and dust mites, improving your home's air quality and providing relief from hayfever, allergies and asthma.
Regular cleaning also helps to keep household surfaces from becoming permanently dull or scratched.
How to dust your home
Take just a few minutes each week to dust your home, using damp microfibre cloths, extendable dusters and a vacuum cleaner.
Natalie Turner, Which? consumer writer, recommends cleaning from top to bottom as dust, crumbs and debris naturally fall as you clean, potentially leading to extra work. Read what Natalie – a former professional cleaner – keeps in her cleaning kit.
Eliminate dust and allergens from your home with one of the best air purifiers from our independent tests